中文版本请点击这里
Welcome to growadandelion.ca! We hope this is the beginning of a lifelong adventure filled with the joy of learning and creating.
Please feel free to browse and read our creators’ works. All the contents on our site are available for viewing to all visitors. If you need a place to start, we suggest trying out the search and filter function and other quick links on the side bar to the right (below the posts on mobile devices).
If you would like to leave a comment on a work, share your own works, or subscribe to a creator’s email notifications, please read our Terms of Service and register for a creator account with us. Please note that once you register, the username cannot be changed unless you delete your account and register again.
Once you have registered and confirmed your email address, you are ready to make your first post. Please follow along below to write your introduction to our community with us and familiarize yourself with the Gutenberg post editor.
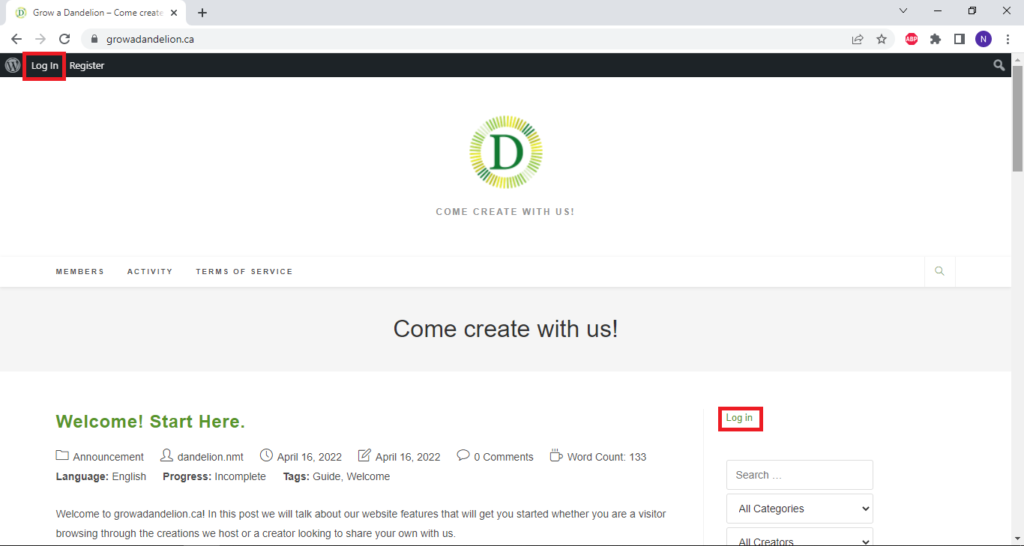
You can find the links to the log in page from the home page either on the top left corner of the page or the top of the sidebar.

When you are logged in, the top toolbar will change its appearance. Click on the top left “+ New” button to enter the post editor.
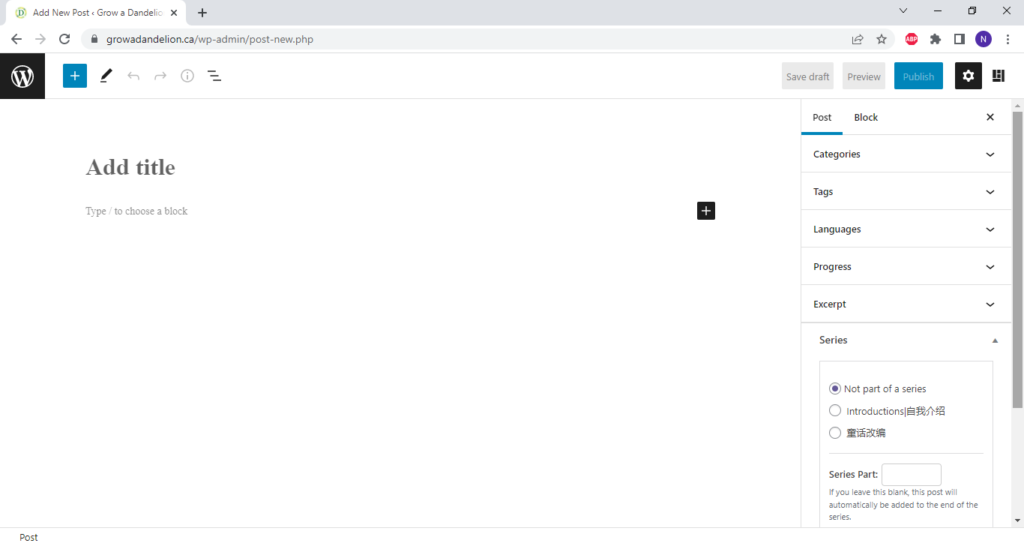
This is the post editor you will be using to post and edit works on our website. We will now go through some of its key functions as we write your introduction post together. First let’s add post title. Click on where it says “Add title” and write “Hello World from ” followed by your website nickname. The title, like other parts of a post, can be changed after it’s published, but be aware that the post URL is created using the original publishing title and cannot be changed unless you make a new post.
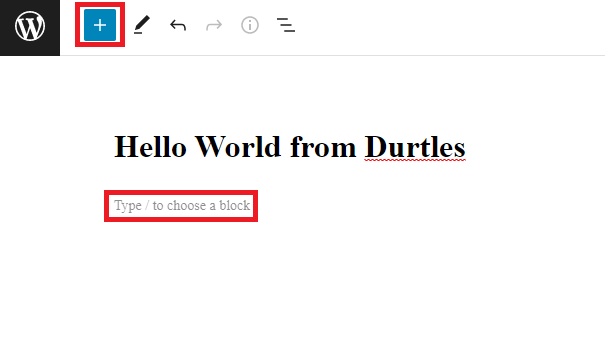
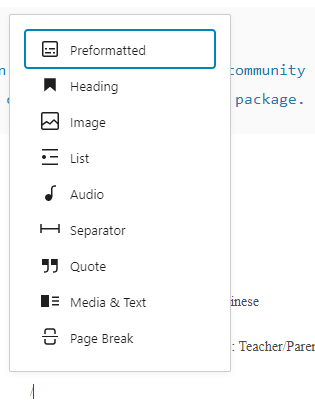
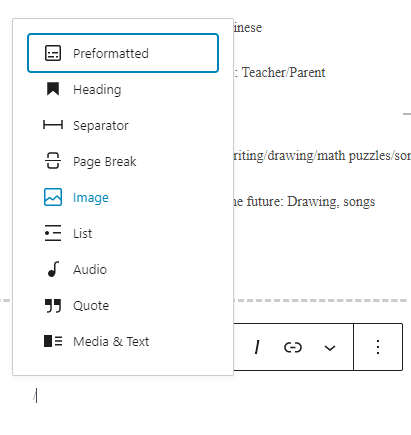
Once you are happy with the title, let’s add our first block to the post. You can choose the type of block to add either by typing “/” and then the name of the block type in the post body or by clicking the blue “+” button to open the complete list of available block types. Let’s add a block called “Preformatted”. This is what we typically use to add author’s notes to the beginning or the end of the post.
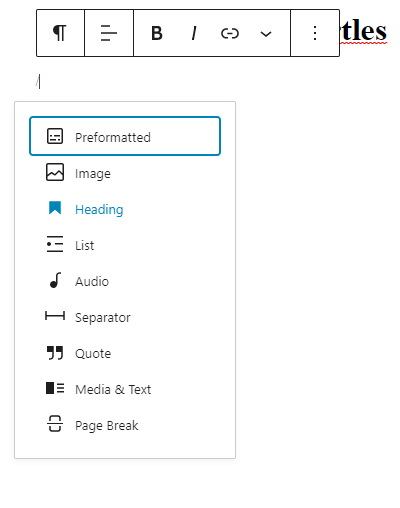
If you do so by typing “/” in the post body, a drop down list will appear. If you don’t see the block type you want, continue typing the name of the block type, and the list will update as you type.
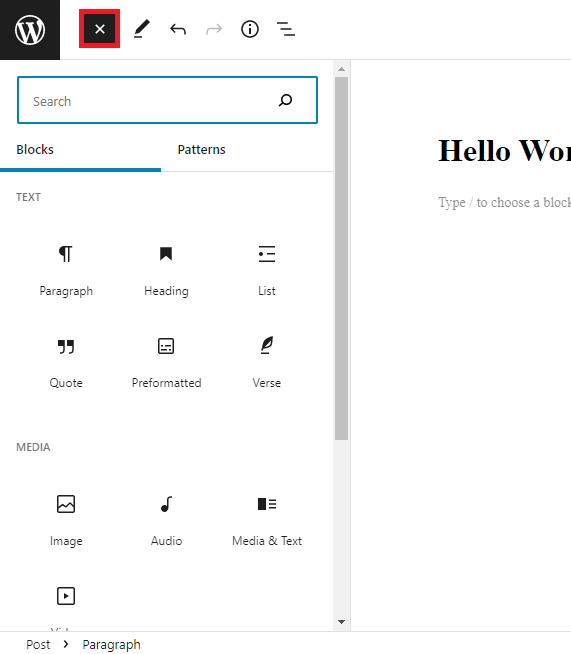
If you use the full list of block types by clicking the “+” button, the “Preformatted” type should be under the first section at the top.

Go ahead and copy the following into the Preformatted block:
Author’s note:
This is my introduction to the Grow a Dandelion community following the outline created by @dandelion-nmt as part of the new user’s welcome package.
Notice that my username after the “@” will turn into a hyperlink to my user profile when this post is published. You can use this method to mention any user on our site in posts, updates, or comments except in post titles. The mentioned user will receive an email notification as well as an on site notification.
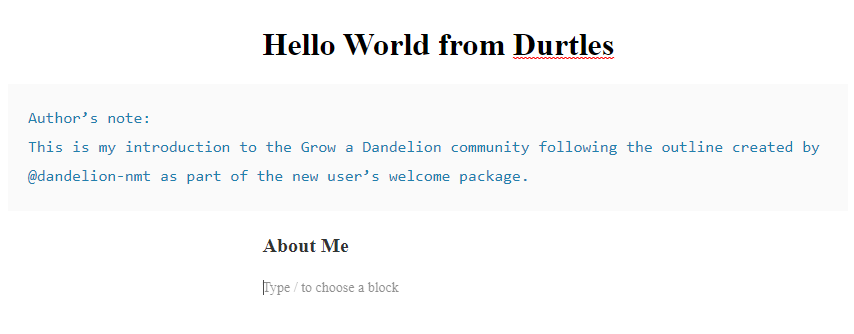
Next let’s add a “Heading” block and write “About Me”. Don’t worry about the Preformatted block not aligning properly with the rest of the post. Once it’s posted it will be aligned to the left margin of the post page along with other blocks.
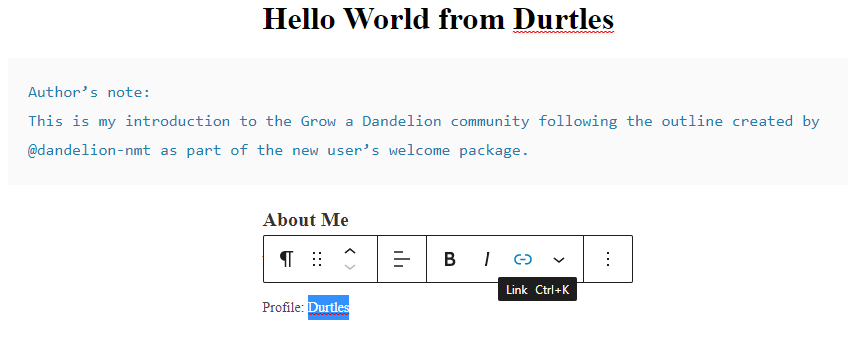
Now we will try adding a hyperlink to our post. Start by typing “Profile: ” followed by your username in a new block. (If you did not select a block type, the default is a Paragraph, which is regular text.) Then highlight the username, and you will see a link button on the floating toolbar among others.
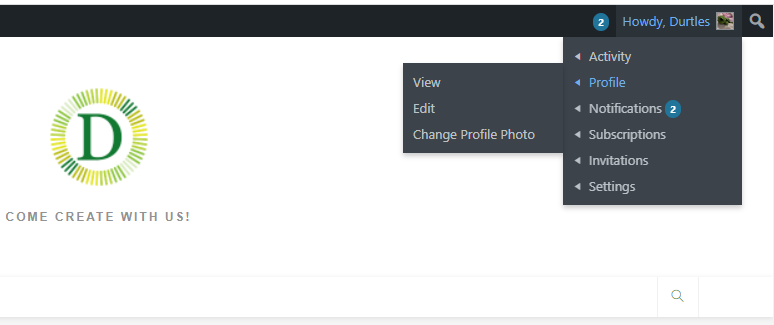
Now let’s grab the URL to your user profile. In a new tab, go to the website’s homepage and click on your nickname at the top right corner. Select “Profile” on the drop down menu to go to your profile page. Copy the URL.
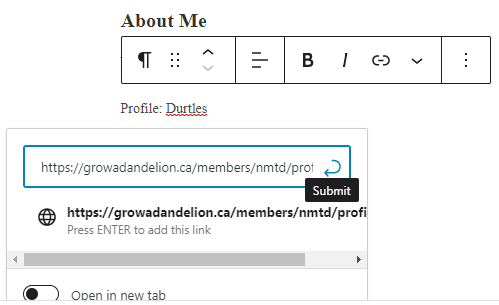
Come back to click on the link button on the toolbar and paste in the copied URL. Remember to click on the “Submit” button on the right. You can also choose if you want the link to open in a new tab.
Copy and fill in the rest of the questions to our introduction:
Nickname:
Language(s) I speak/read:
Role(s) (teacher/parent/student/etc.):
When you are done, put in a “Separator” block to make a small horizontal line to divide the post into sections. Please feel free to add “Spacer” blocks before or after the separator to add space between sections.
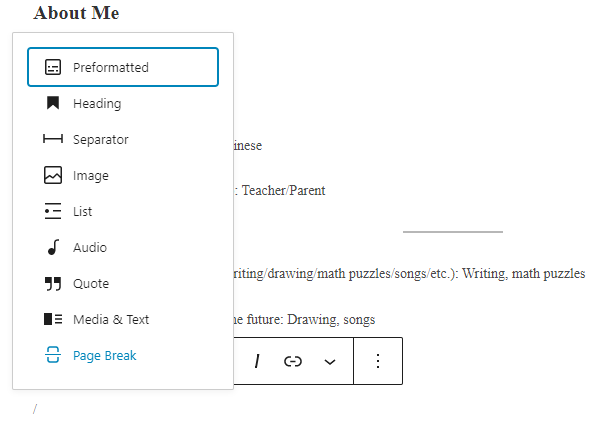
Continue to copy and fill in the next set of questions after the Separator block:
Things I have created in the past (writing/drawing/math puzzles/songs/etc.):
Things I want to learn to create in the future:
How I found growadandelion.ca:
Other comments:
Please don’t be afraid to fill in “None” for the questions about what you have created/want to create. We welcome spectators and appreciate that you are registering for an account to leave comments and encourage our creators.
When you are done with this set of questions, please put in a “Page Break” block. This will separate your post into two pages with links to each individual page on the bottom of the post page.
On the next page let’s add a heading that says “Embedding Files”. We will now try to embed an image into our post. Video and audio files can be embedded into the post using similar methods.
Add an “Image” block after the heading. We will then need the URL of the image we want to add.
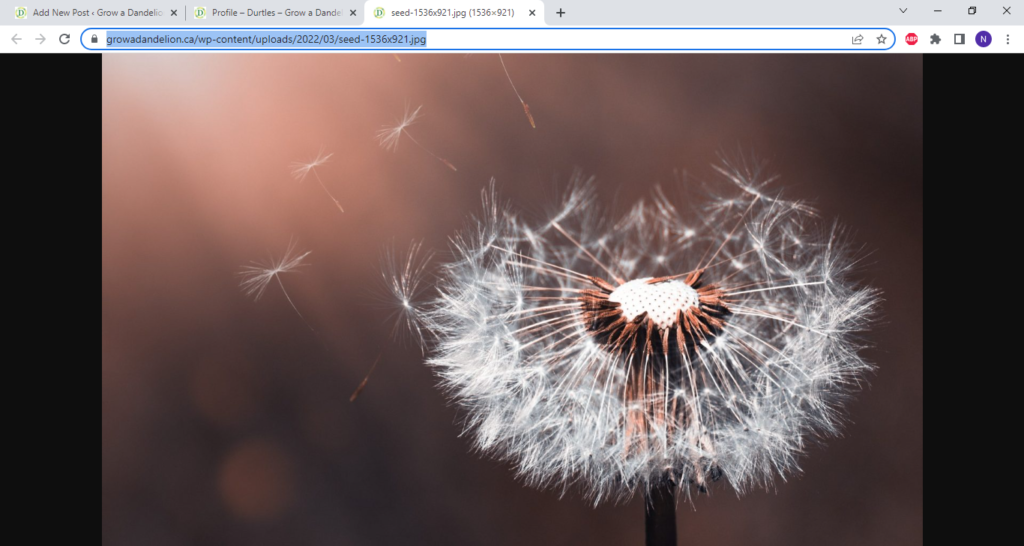
If you do not have an image you want to share and have already uploaded elsewhere online, please feel free to use our themed stock photo with the following URL:
https://growadandelion.ca/wp-content/uploads/2022/03/seed-1536×921.jpg
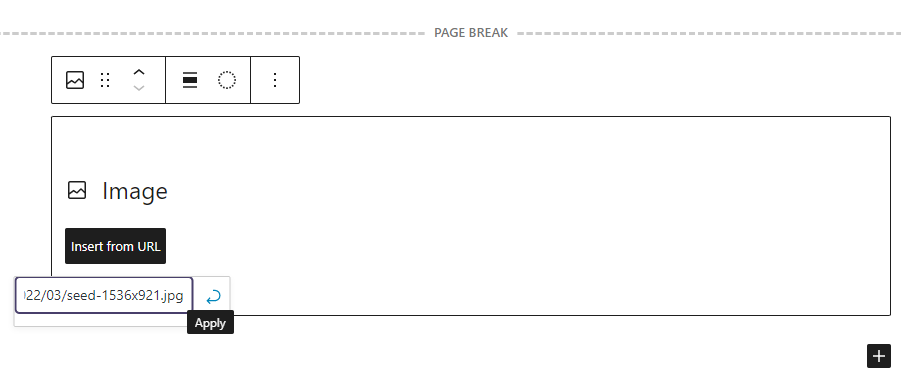
Click on the “Insert From URL” button and paste the URL into the prompt. Press the “Apply” button when you are done, and the image will be embedded into the post.
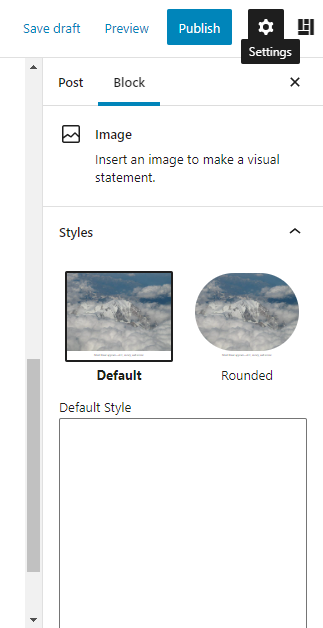
There is a “Settings” button on the top right region of the post editor, and under the “Block” tab you can change the style of the currently selected block in your post. This includes visual styling for images and typography, size, and colours for your text fields. Please feel free to explore your options here before we move on to the final steps of constructing this post.
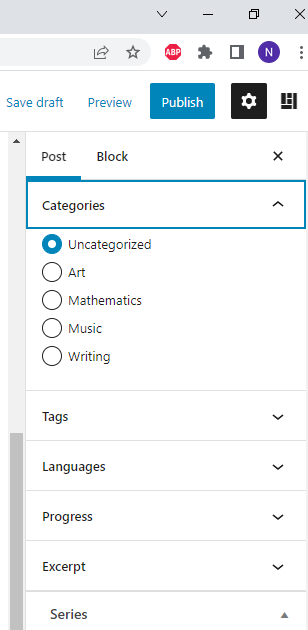
When you are finished with the “Block” tab, go on to the “Post” tab. These are information about the post that we need to fill in before we publish. They will affect how the post is displayed and organized and how it responds to search queries.
The first is the post’s “Category”. Since this is an introduction post and not a creative work, please leave it as “Uncategorized”.
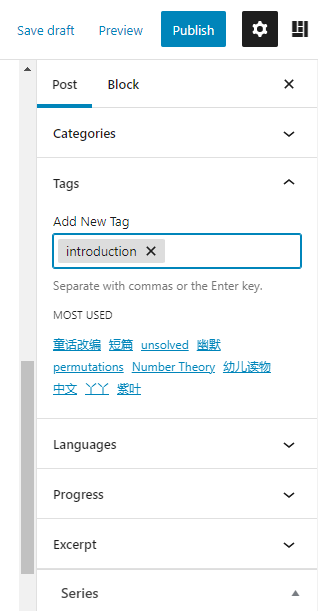
Next is the tags you wish to add to your post to make it more easily searchable to visitors. For this post, let’s add the tag “introduction”. You can add tags by selecting them from the “Most Used” list below or by typing your own into the “Add New Tag” box. A tag in the box will not be added to the post until you use the comma or the Enter key. You’re welcome to add as many tags to your post as you deem helpful.
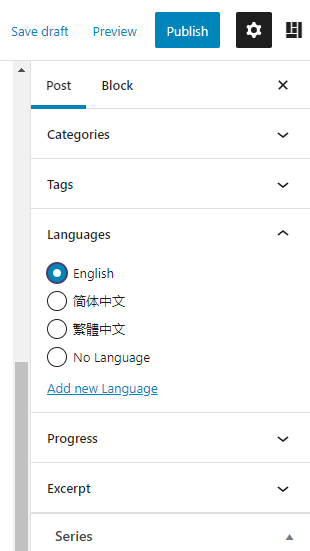
Then we have “Language”. If you followed this post you have likely created your introduction in English, so please select English. The Language field is helpful for visitors to search for posts. It is also used in the algorithm to display word count as an estimate to the length of the post. The word counts of English posts are calculated by the number of spaces, tabs, or other separators following non-space characters, whereas the word counts for Chinese posts are more directly related to the total number of characters in the post.
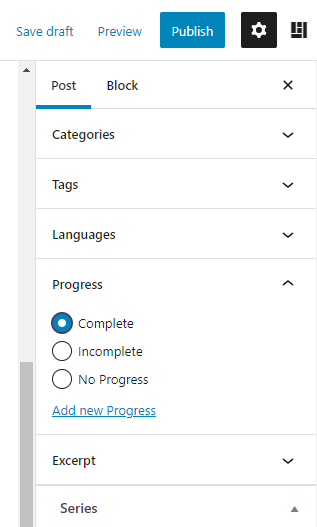
The “Progress” field marks if a work has been completed and therefore will likely not be updated in the future. Our introduction will not be updated with new subsequent content, therefore we are marking it as “Complete”. You’re still welcome to make changes to the post after it’s published though, as you are with post you make on the website.
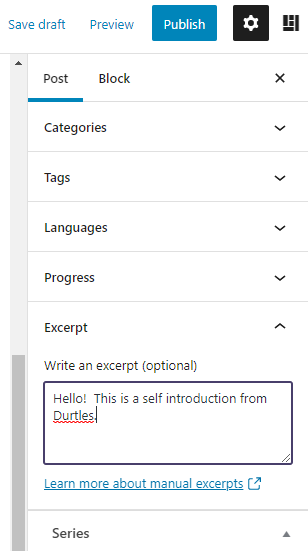
The “Excerpt” field works as a summary to your post on the blog listing and search results. Please always remember to fill in this field. If you don’t, your entire post will be displayed in the blog listing and clog up the page. We reserve the right to add a generic excerpt to your post if it causes problems for our blog pages.
For this introduction, please put “Hello! This is a self introduction from ” followed by your website nickname into the field.
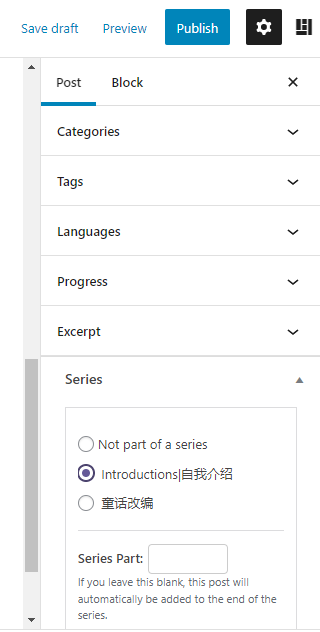
If add your post to a “Series”, a link to the series and other posts in the same series will appear on your post. There is currently no way for regular creators to add a new series because all series are public, and any creator can add to a series anytime. If you wish to create a new series to organize your own work, please comment on this post (Welcome! Start Here.) below, and the administration will help you add it backstage.
For this introduction, please select the “Introductions|自我介绍” series. This will put all English and Chinese self introductions in the same series for community members to find.
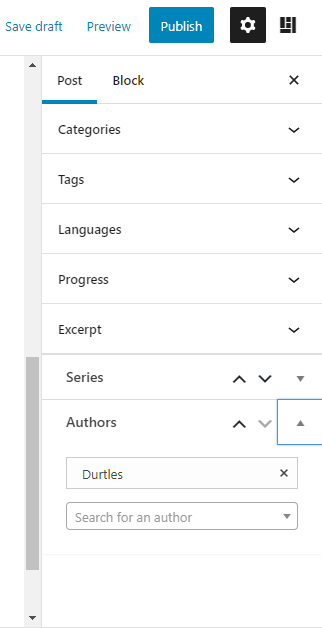
Our website supports having multiple authors assigned to the same post. Please add other authors here if you are collaborating on a project together. Please note that any author you add to the post will have the ability to edit or delete the post, including adding other authors or removing you from the authors list. Please double check the username before adding an author.
Any post created by you will automatically have you as the author here. We don’t need to do anything here for this introduction post.
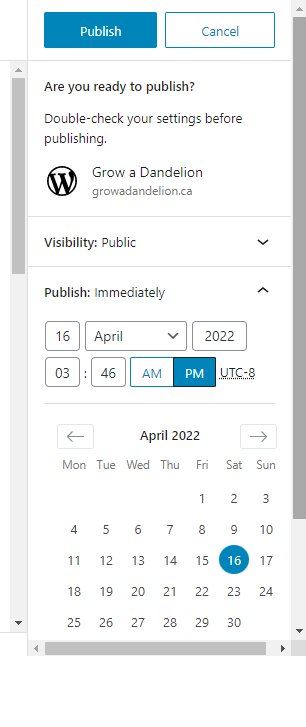
When you are satisfied with how the post looks, click the “Publish” button on the top right of the post editor, right beside the “Settings” button, and you will see the option to set the time to publish. The default setting is “Immediately”, which will mark the post as published at the current time. You can also set any date and time for the post to be published. If the time is in the past, the post will be “back-dated”, or marked with an earlier time stamp for the “published date”. If the time is in the future, the post will be scheduled to be published at that time.
For this introduction, leave it at the default setting and click the blue “Publish” button again.
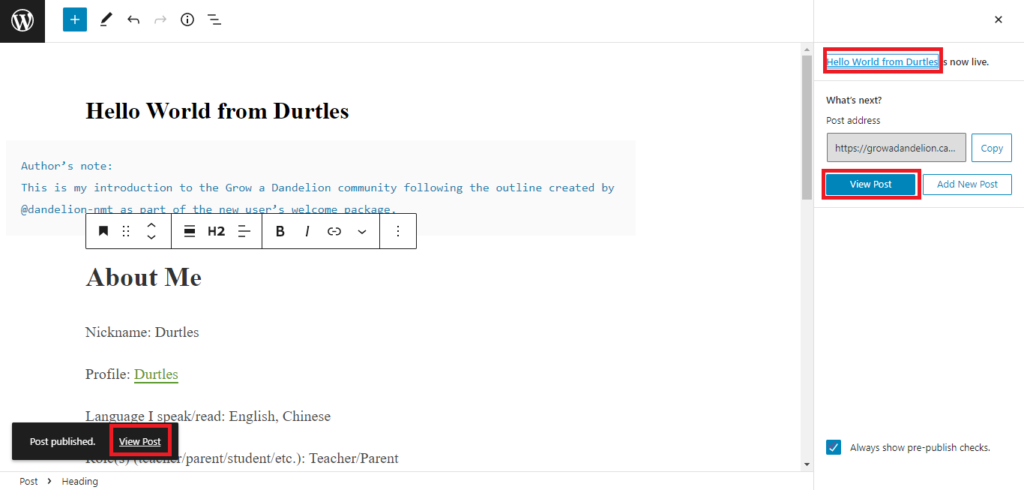
Give the system a few moments to upload your post, and when it’s finished, you can go and see your newly published post by clicking on one of these links. An email notification is sent out to all your subscribers to notify them of your new post.
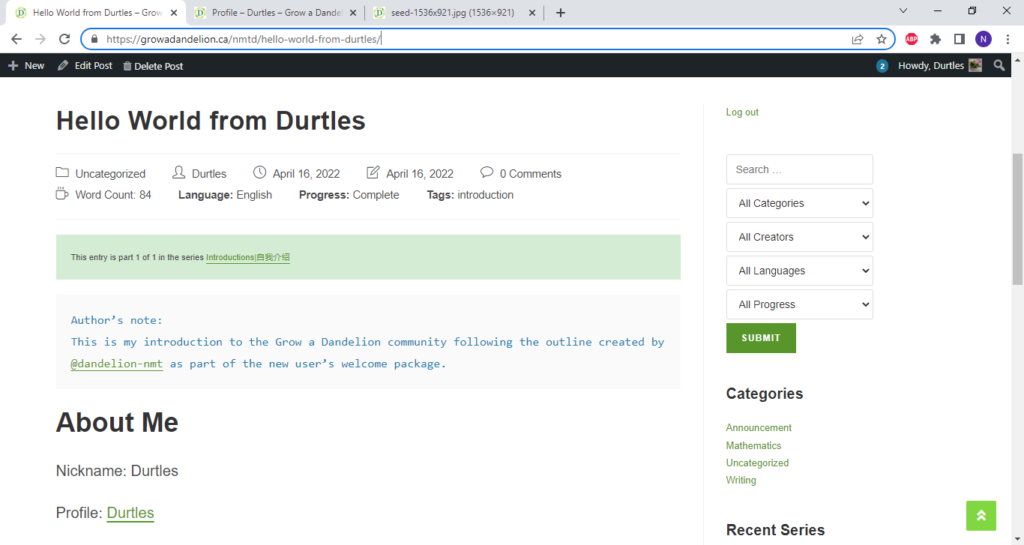
Congratulations! You have successfully published your first post with us!
Note that if you are viewing a post of your own, you have the option to “Edit Post” or “Delete Post” on the top left corner beside the “+ New” button. Your subscribers will also receive an email notification each time you update a post after editing, so please keep minor editing to a minimum after you publish a post to avoid spamming your subscribers. The best way to do this is to keep a copy of your work on your own computer off-site so you can do all your editing and update in one go when you are finished.
Please feel free to explore the home page and your profile page area for more features. If you have any questions, please comment below, and we will take them as suggestions for future tutorials on site functions. We welcome you again and hope you enjoy your time with us.

